A form element with field elements and a button element inside of it. Check. No-code configuration for the form element. Check. Low-code actions on the button element. Check. Your app’s all set to collect data through a form! But how do you see this data?
When data is submitted through a form element, it gets saved into the table linked to the form element in the element’s no-code setting. To see a visualization of your table and the data within it, the table element and table viewer tool can help! With the table element, you can implement a visual grid of your data into your interface with which your users can interact. On the other hand, if you only want to view and modify your table’s data without making it a part of your app, you can access the table viewer from the Data Manager.
The Table Element
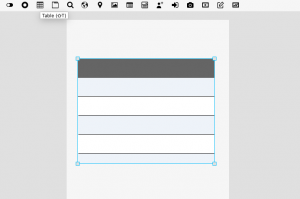
Select the table element tool from the header in Appli and draw a table element onto the playground area. The element will appear empty at first, but once it’s connected to a data table, it will be populated with its keys and data.
Linking Your Table Element to Your Data Table
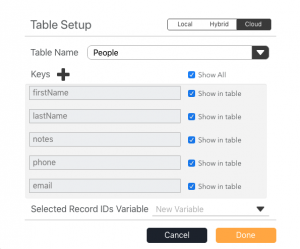
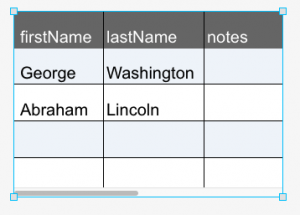
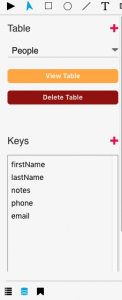
To connect this element to the table whose data you want to view, select your table element, open its no-code option at the bottom of the right pane, and select your table from the dropdown. Next, you can choose which keys you want to be displayed in your table element. Click the “Done” button and watch your table element populate with data!
Customizing Your Table Element
The property inspector is displayed on the right-hand side when your table element is selected. Here, you can change various properties of your element, such as appearance and functionality. The table element has many different properties, but we will focus on some key properties that affect how you interact with the element.
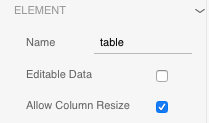
The “Editable Data” property in the “element” section of the property inspector indicates whether new records can be added to your table and if existing records can have their values modified through the table element. Turning this property off will prevent any changes to your table.
The “Allow Column Resize” property in the same section will let your users adjust the size of the columns of your table element when using your app in Appli Player. These changes to column size will not affect the actual table element and are only seen by the user on their device.
The Table Viewer
To display the table viewer, switch the left pane to the “Data Manager.” You can do this by clicking on the middle icon at the bottom of the left pane of Appli or by using the keyboard shortcut Cmd + D (MacOS) or Ctrl + D (Windows). If you have not created any tables, you must create one before you can access the viewer. If you have created at least one table, select it from the dropdown or click the “view table” button, and the viewer will pop up.
An Overview
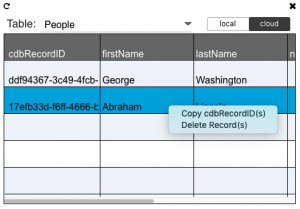
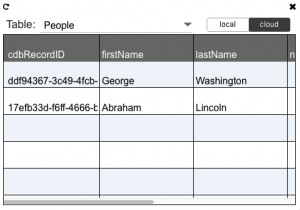
All keys and records of your table are shown in the viewer. Each column represents a key, and each row represents a record. Some keys and their values, such as the “cdbRecordID” key, are built into your table and cannot be modified. This key represents a unique identifier for your records.
If you want to view a different table, select it from the viewer’s dropdown. Toggling between “local” and “cloud” will show you your table’s data currently stored locally or in the cloud. If changes to your table have occurred while the viewer was open, you can refresh the viewer by clicking on the icon in the top-left corner.
The appearance of your table in the viewer can also be changed. Clicking on a key in your table’s header will sort the table’s records by the chosen key. Clicking on a key and then holding it will allow you to rearrange the columns of your table.
Modifying and Accessing Your Table’s Data
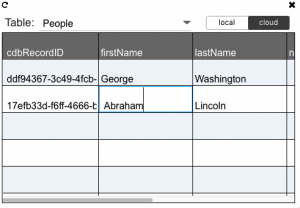
New records can be created by selecting an empty row at the bottom of your table and double-clicking in a cell. Enter a value and click outside of the cell, and a “cdbRecordID” will be generated for the record you created.
To change the value of a key for a record, select a record and double-click on a cell. You can now edit the value, press the Return/Enter key, or click away from the cell to save your changes.
If you want to remove records, select one or more from your table and right-click to bring up the contextual menu. Select the “Delete Record(s)” option to remove all selected records from your table.
In addition to deleting records, you can also retrieve the “cdbRecordID” value for multiple records by selecting the “Copy cdbRecordID(s)” option in the right-click contextual menu.