
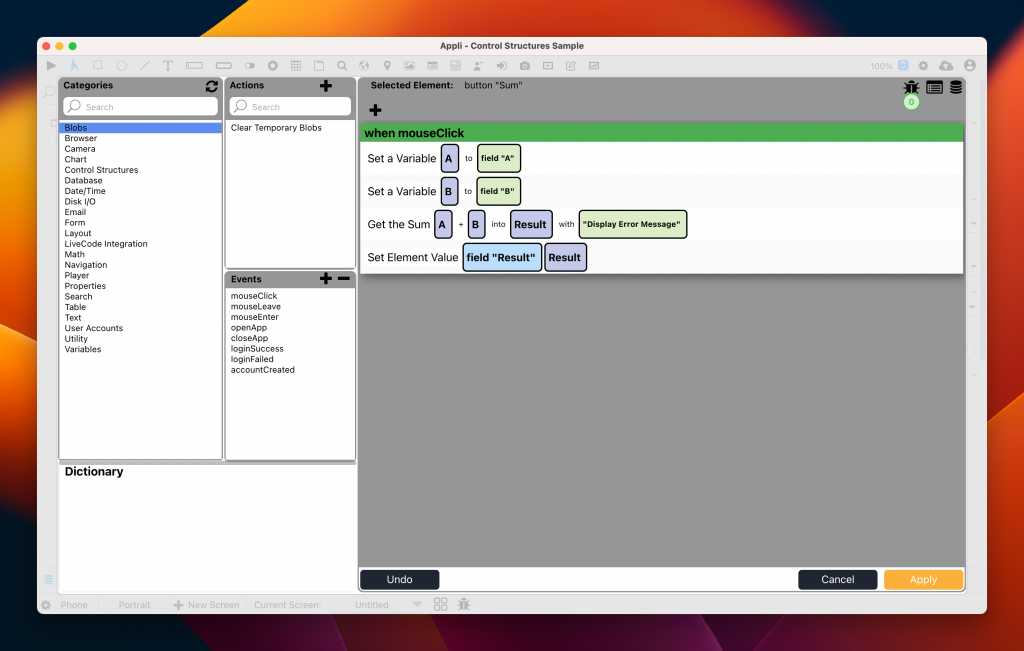
If you’ve followed the tutorials in the Appli Documentation, you’ve used low-code to create a sequence of actions and configure the behaviour of your elements. These sequences of instructions execute in order when the specified event is triggered. The example below shows a script that is activated when a button is clicked and calculates the sum of two fields.
Sometimes, we don’t want the sequence to execute linearly from start to finish. We want it to branch and skip or execute some actions depending on a certain criteria or even repeat them if needed. The ability to alter the flow of instructions is one of the cornerstones of computer programming. In Appli we can achieve that by using the actions from the Control Structures category.
In this article, we’re going to do a brief tour of them. So grab a tea or a coffee and come with me in our gallery walk of control structures.
While most actions you deal on a day to day basis are an independent single-line instructions, Control Structures span multiple lines. You’ll need to add the action to start a control structure and remember to add the one that marks its end.
If Actions
The most common structure is the if clause. In its simplest form it allows you to execute some actions depending on the specified condition. The example below is just a minor alteration from the one above, besides doing the sum it displays a message based on the resulting value.
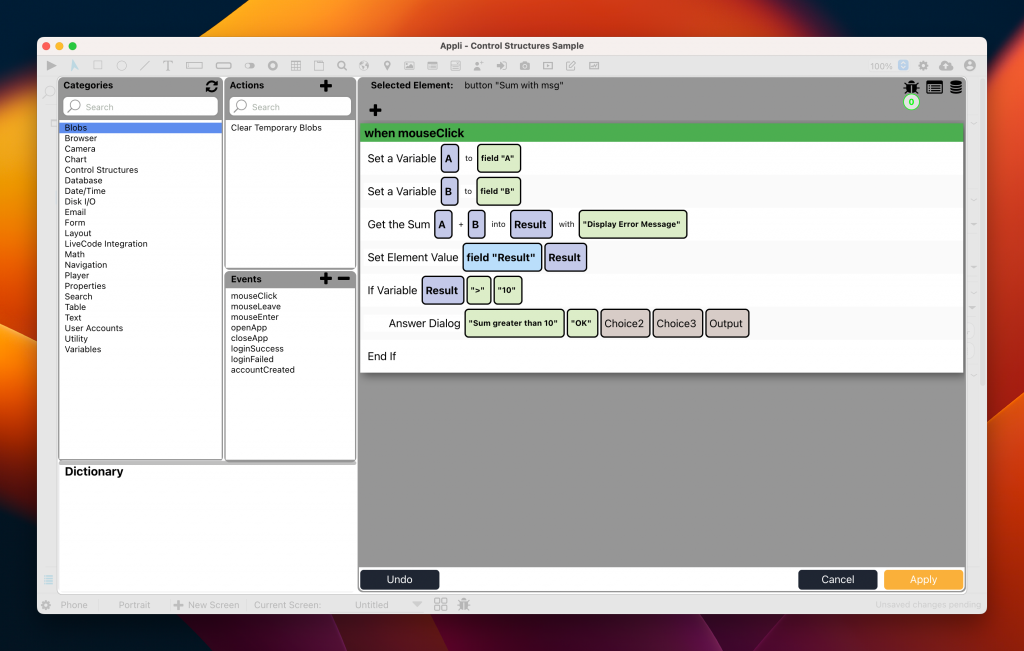
Notice that the “If Variable” action begins a control structure. All actions below it are shifted to the right to signal that those actions will only execute if the statement in the if variable action is true. The “End If” action closes the control structure, all actions after it will execute regardless of the “if variable” action.
The format of the condition is always a variable, an operator, and a value to compare.
Besides “If Variable” which can check for values in a variable, you also have “If Property” which behaves the same way but checking the value from an element property instead of a variable. The example below behaves the same as the one above but instead of checking the value from the result variable, it checks the content of the result field using the “If Property” action.
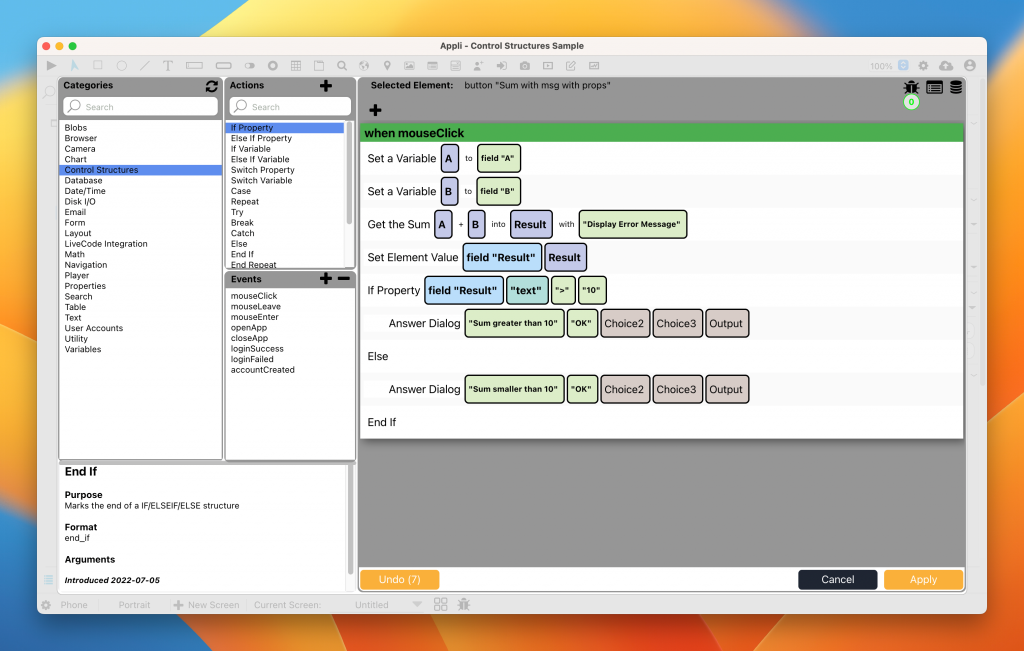
Every “If Action” needs an “End If” action to close it. You can add as many “Else”, and “Else If Variable”, and “Else If Property” actions inside it as needed to compose your low-code script. The example above will show different messages depending on the value of the field. The second message is after an “Else” action and executes only if the “If Action” doesn’t match.
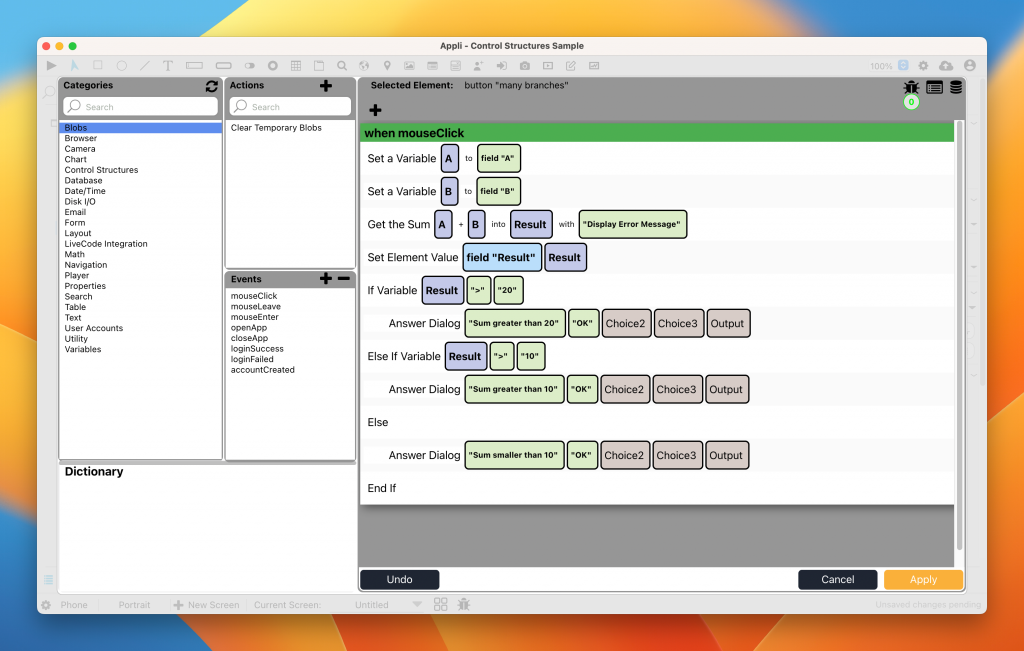
Here is an example with many branches:
If you want to compare exact values, you might be better served by another control structure: the Switch action.
Switch Actions
Switches can have many branches and they’re used to compare exact values. In this they’re less versatile than a switch, but in cases when something can only have some possible values they’re the perfect action to use.
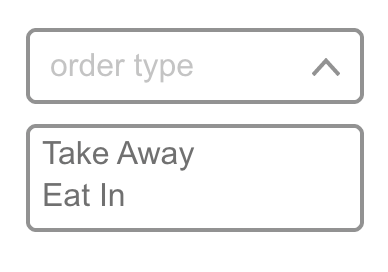
Consider a dropdown element with a food order type:
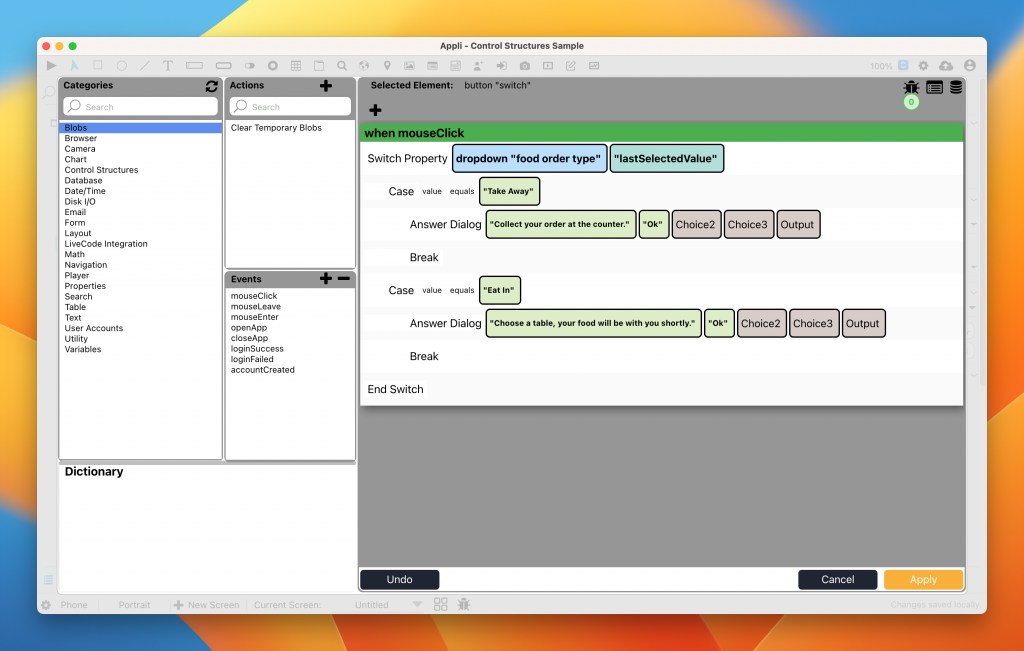
 We can use a “Switch Property” action to check the selected value. Like the “If Actions”, the “Switch Actions” come in two forms, one to check properties and another to check variables. You can add as many “Case Actions” as necessary to compare all the possible values.
Sometimes we don’t want to branch between actions, we want to repeat them. For those cases there is the “Repeat Action”
Repeat Actions
The “Repeat Action” will execute the actions inside it as many times as specified in the action. It is a good way of iterating through records or lines for example.
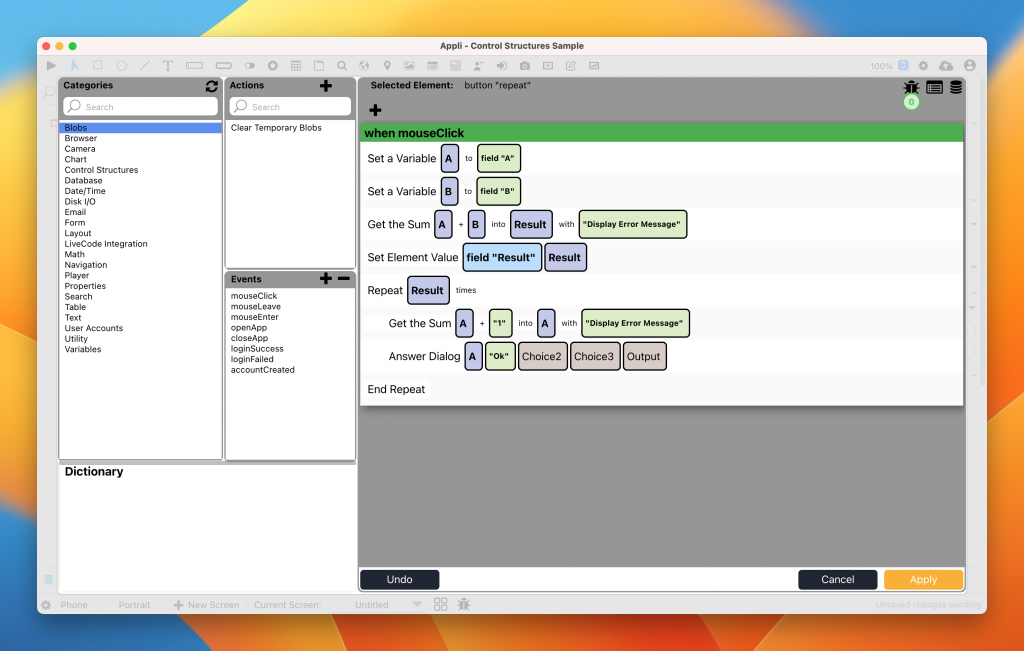
The example above will count from the number in the first field element all the way up to the sum of both elements, displaying a message for each number. Not the most useful example, I know, but you get the gist.
Try Actions
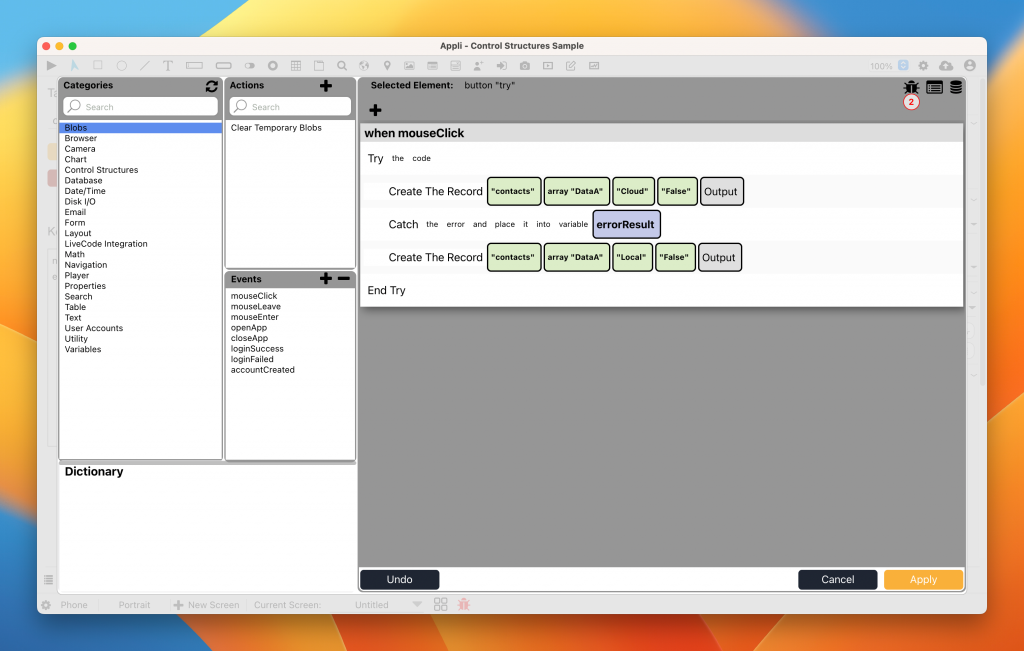
Our final control structure is the “Try Action”. It is used when you suspect that some action inside it might fail and you want to be proactive and handle it yourself instead of relying on Appli default handling. It is very important that you don’t surprise your users with errors, so using the “Try Action” when appropriate will make your app much more professional.
In the example below, we attempt to create a record in the cloud. If it fails, we create it locally (later we can use the “Sync Records” action to upload our locally created records).
I hope this brief tour of our control structures has been beneficial for your app development. Don’t hesitate to reach out to me on the forums in case you need any clarification or further explanations.