Have you ever encountered some product you loved, such as a wine or coffee or cheese, just to forget its name later? Are you into something to the point of keeping a diary about it? Well, Appli can help you there.
There are many apps catering to enthusiasts of many things. From wine lovers to comic book collectors. These apps tend to follow the same UX patterns: An easy way to capture a review from the product, a list of past reviews, and an easy way to search your own database of reviews.
An example: Having some nice coffee and then taking pictures of it, giving it a star rating, writing your impressions about it.
In this brief tutorial, we are going to write one of those apps. Even though we are going to focus on coffee, you could adapt this app to any other kind of product. I just like coffee and want to convince more people to enjoy it, so here we are.
The good thing about designing your own apps is that you can make them suit your own taste and preferences. You don’t need to start with a perfect design. Just as your tastes change and develop over time, so can your app. This also applies to database design. We can start with a minimal set of keys and a single table and then add or remove keys as we learn more about how we want to use our app.
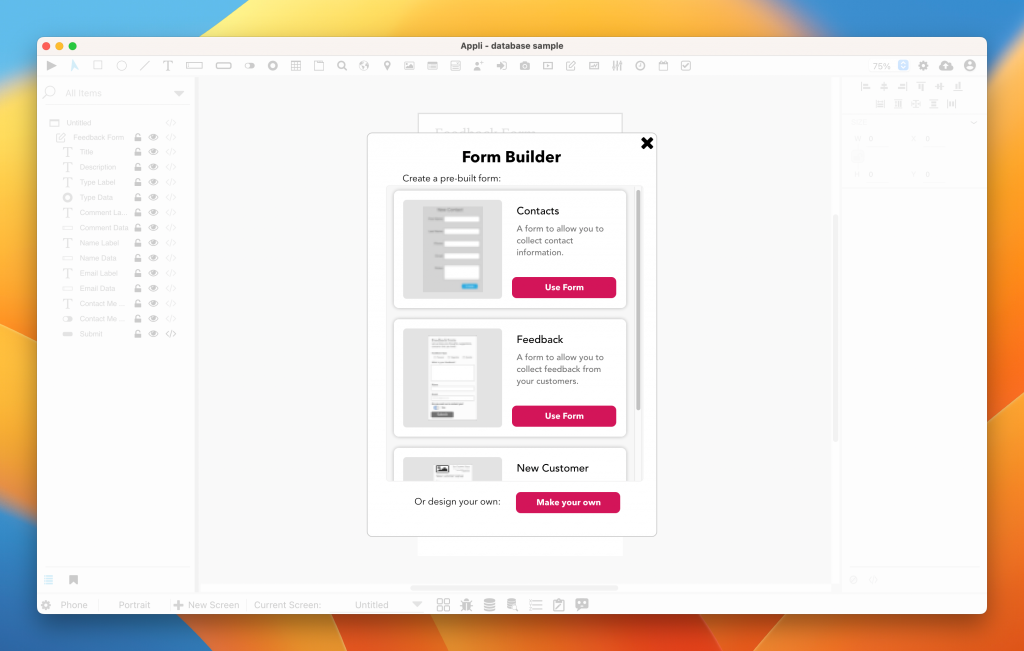
Instead of starting by creating the table, we can speed things up by using the Form Builder to create both the form and the new database at the same time.
The form builder is at the footer, it is an icon with a clipboard. Instead of picking one of the pre-made templates, select “Make Your Own”.
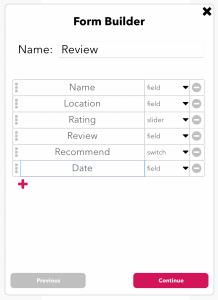
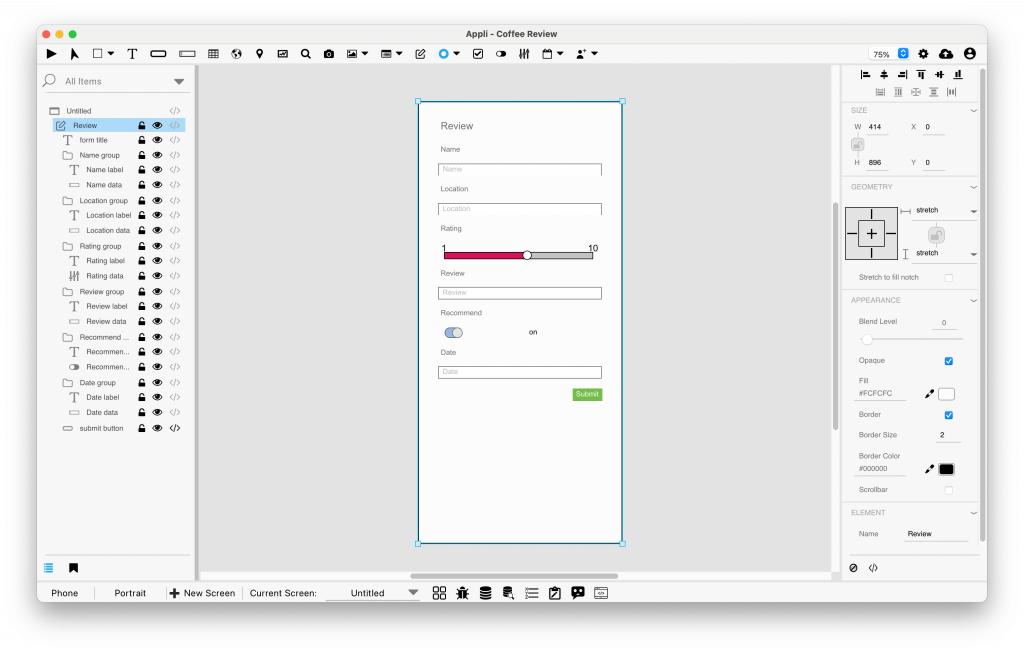
Let’s name the form “Review” and have the following keys:
- Name
- Location
- Rating
- Review
- Recommended
- Date
It will look like the screenshot below.
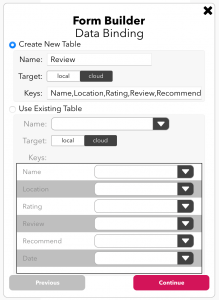
On the next step, let’s allow the form builder to create a new table named reviews.
For the purpose of this tutorial, let’s leave the style as it is.
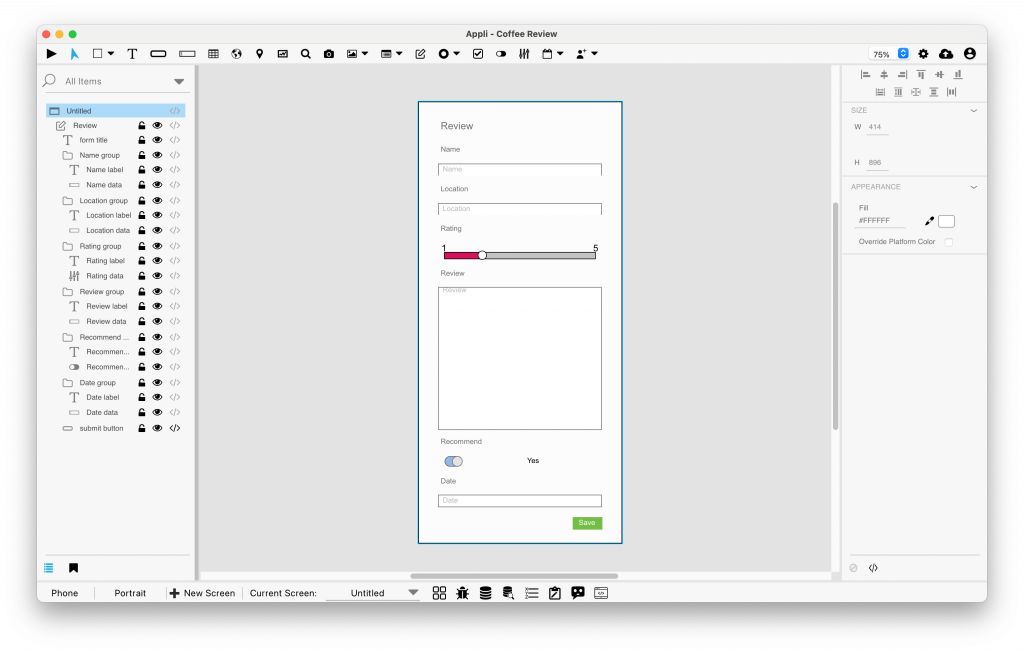
We now have a form and a table ready to accept reviews. This is how the form looks:
A form created with the Form Builder looks magical, but it is the exact same kind of workflow you would have created manually. We’ll alter that form to better suit our needs by making the review element larger and multiline, and some other cosmetic alterations.
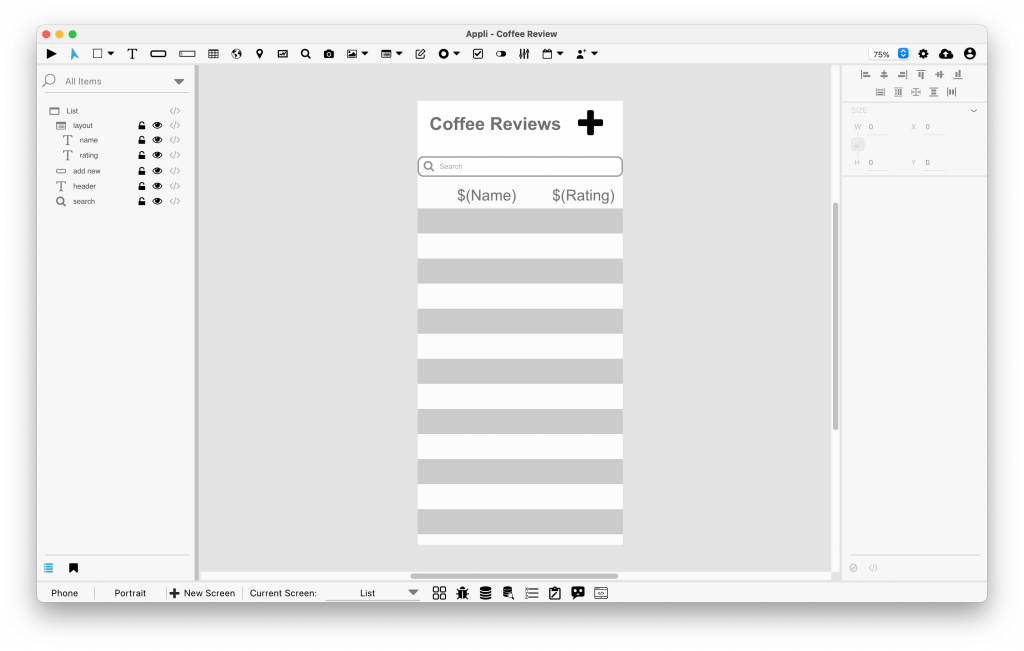
 The next step is creating a record listing.
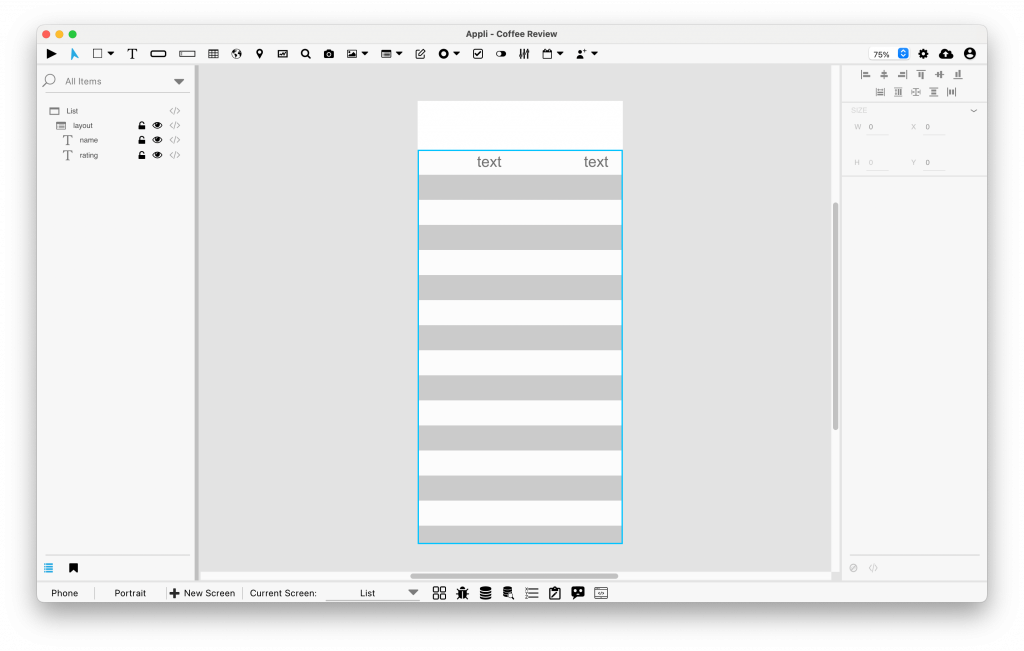
Create a new screen named “List”. In it we are:
* Adding a multiple-row layout and two text elements to it.
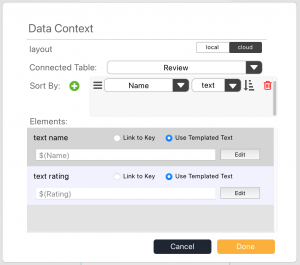
* configuring the layout to list records from reviews.
* Binding one of the text fields to the “name” key and the other to the “rating” key.
Once that is done, we add a button to add a new record and a search field element to help us look for records.
 Need to add some low-code to the layout to be able to edit the selected record (which for all our purposes is the same as viewing it).
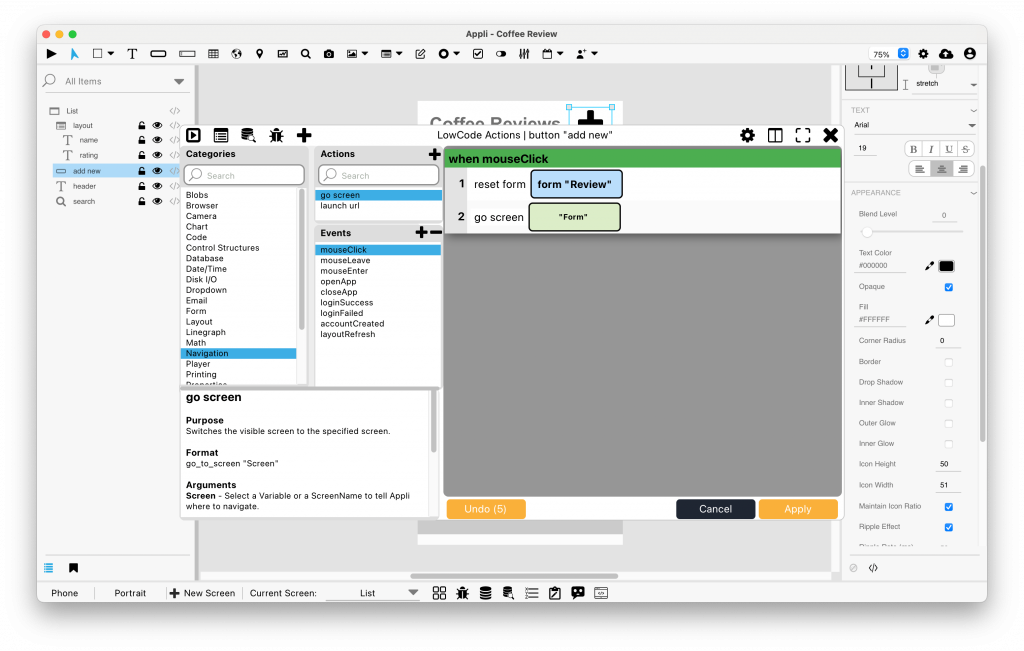
Low-code for the “add new” button
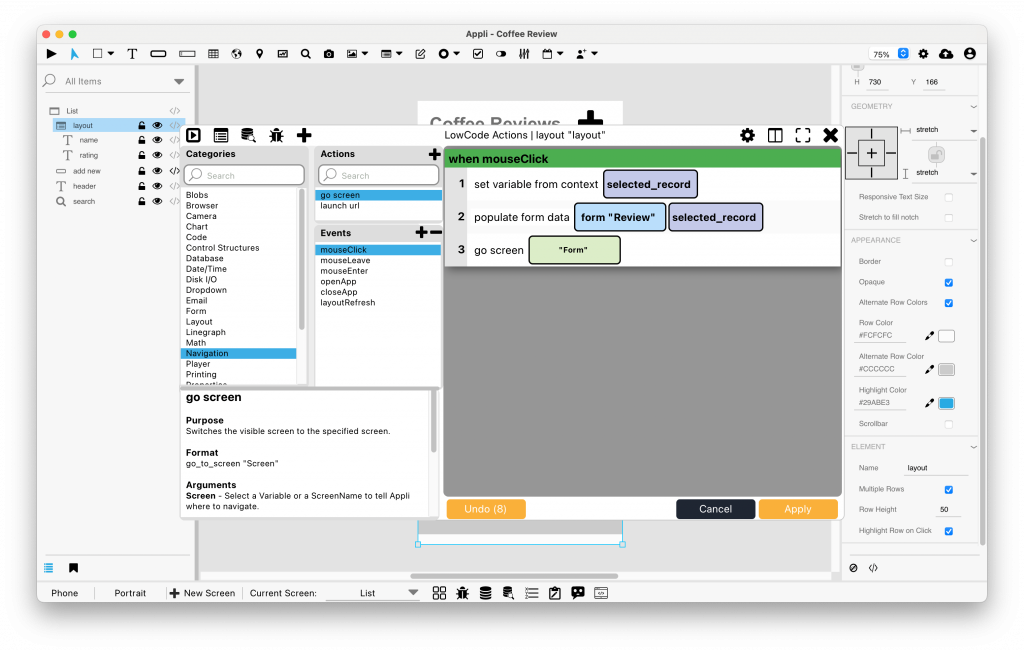
Low-code for the layout element
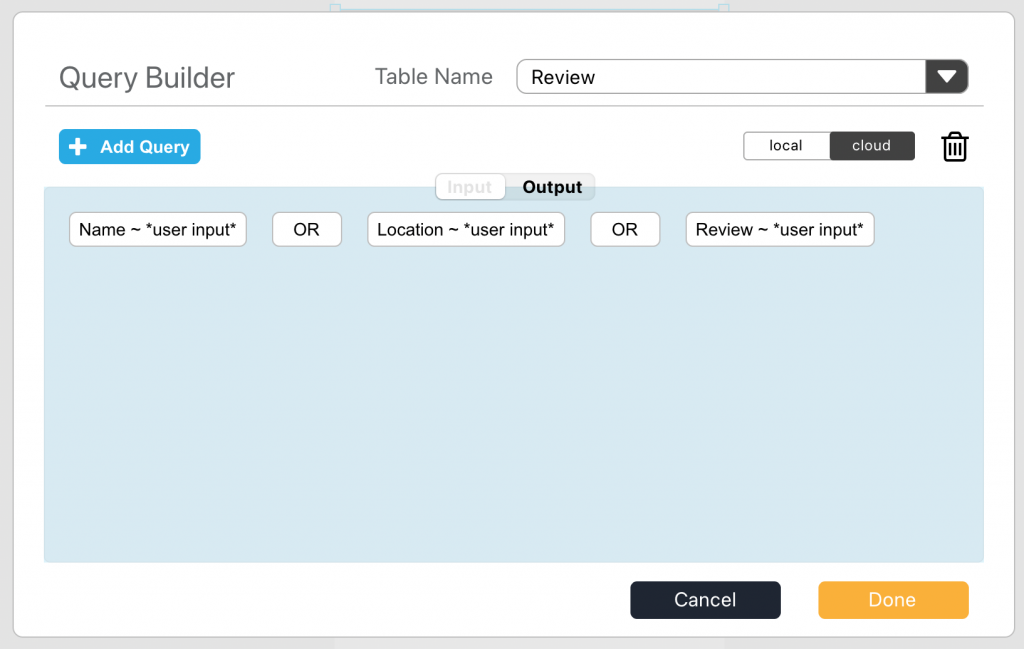
No-code for the search element input tab.
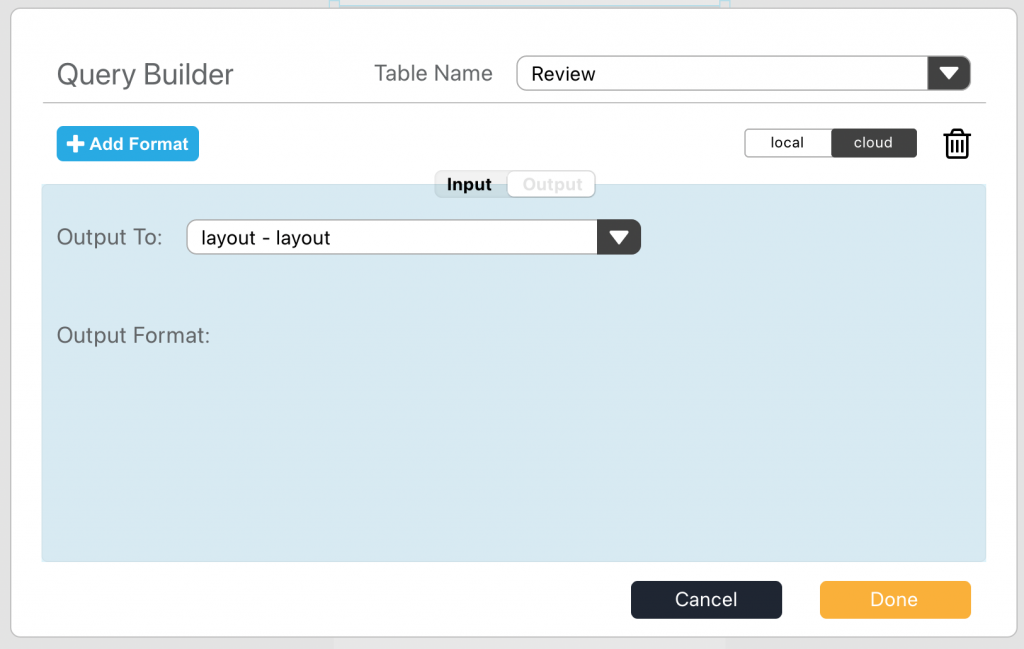
No-code for search element output tab
That covers our listing screen. There are many enhancements you could consider doing, such as adding a slider to filter by rating.
Back on our form screen, we need to add some low-code to the save button to return to the list screen after saving and a button to go back without making changes.

Changes to the save button low-code script
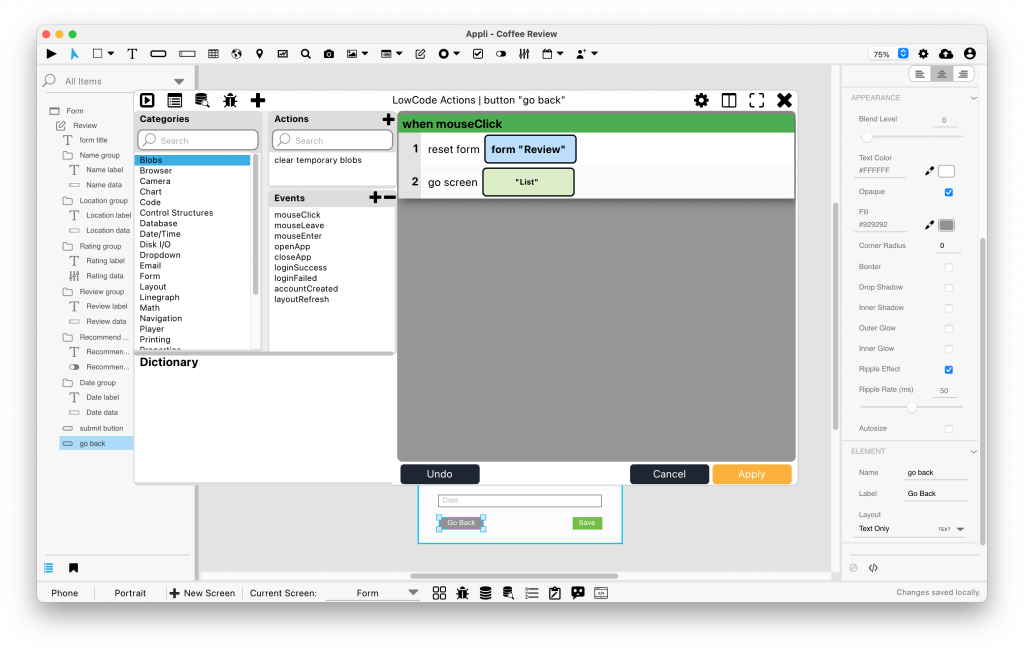
Low-code script for the new “Go Back” button
With that done, our minimal app is ready and we can go around collecting our reviews and having a good time.
Here is the finished version in case you just want to fiddle with a ready-made version you can simply import into Appli.
The same approach can be used to develop a review app for other kinds of products, from books to cheese. Whatever is your passion, you can do it. No one knows better than you what you want from a review and ratings app. Your bespoke solution will feel better than using other apps and your data is safe and private courtesy of our cloud.
Can’t wait to see which variations on this idea you’ll create. If you build your own, tell us all about it in our forum.