Through the years, smartphones have increasingly given us immediate access to everything we need: a quick Google search and you have books, videos, movies and TV shows, contact with our loved ones, and eventually, connectivity to other essential devices. The latter are the handy Internet of Things (IoT) devices that let us turn on lights, roll down blinds, and monitor different environments.
IoT devices are generally described as nonstandard hardware capable of connecting to wired or wireless networks to transmit data. So, for instance, your door camera is considered an IoT device that you can control through your smartphone, sending you data from its camera 24/7 and alerting you when someone is near your door.
In 2024, there were over 18 billion connected IoT devices — a 12% increase over 2023. Many households today inadvertently use them, whether to feed their pets or turn on their washing machine. Simply by tapping some commands on their phone screens, they can access the power of modern IoT devices.
But, if you want to go a step further, today’s technology also allows you to personalize your own IoT apps so they can fulfill your specific needs. Let’s look at a use case on building your IoT app with low-code/no-code tools.
Why Build an App for Your IoT Devices?
Predetermined IoT apps aren’t always enough — they might be too basic, or your needs simply go beyond what they can offer. Whether for personal or professional use, there are several reasons why you could take matters into your own hands to build an IoT app from scratch.
For example, you’re managing more than one greenhouse or otherwise need to handle many humidity sensors. Furthermore, you would like to consolidate their historical data so you can share it or build reports and data visualizations to make better decisions regarding temperature, irrigation, and location.
But your sensor’s app only allows for one device to be viewed at a time, and only shows current data. In this case, building an app to consolidate all of your sensors can make for an easier IoT device monitoring experience, and you can personalize it to display and export historical data.
Furthermore, you might be delving into building your own IoT device for personal use, like a crafty lightbulb or a small gate system inside your hamster’s cage that senses movement and uses actuators.
You could also need an app for your commercial IoT prototype. The use cases are many, and the solution can be as easy as using a low-code/no-code platform that allows for flexibility and device connectivity.
Getting Started: What You’ll Need
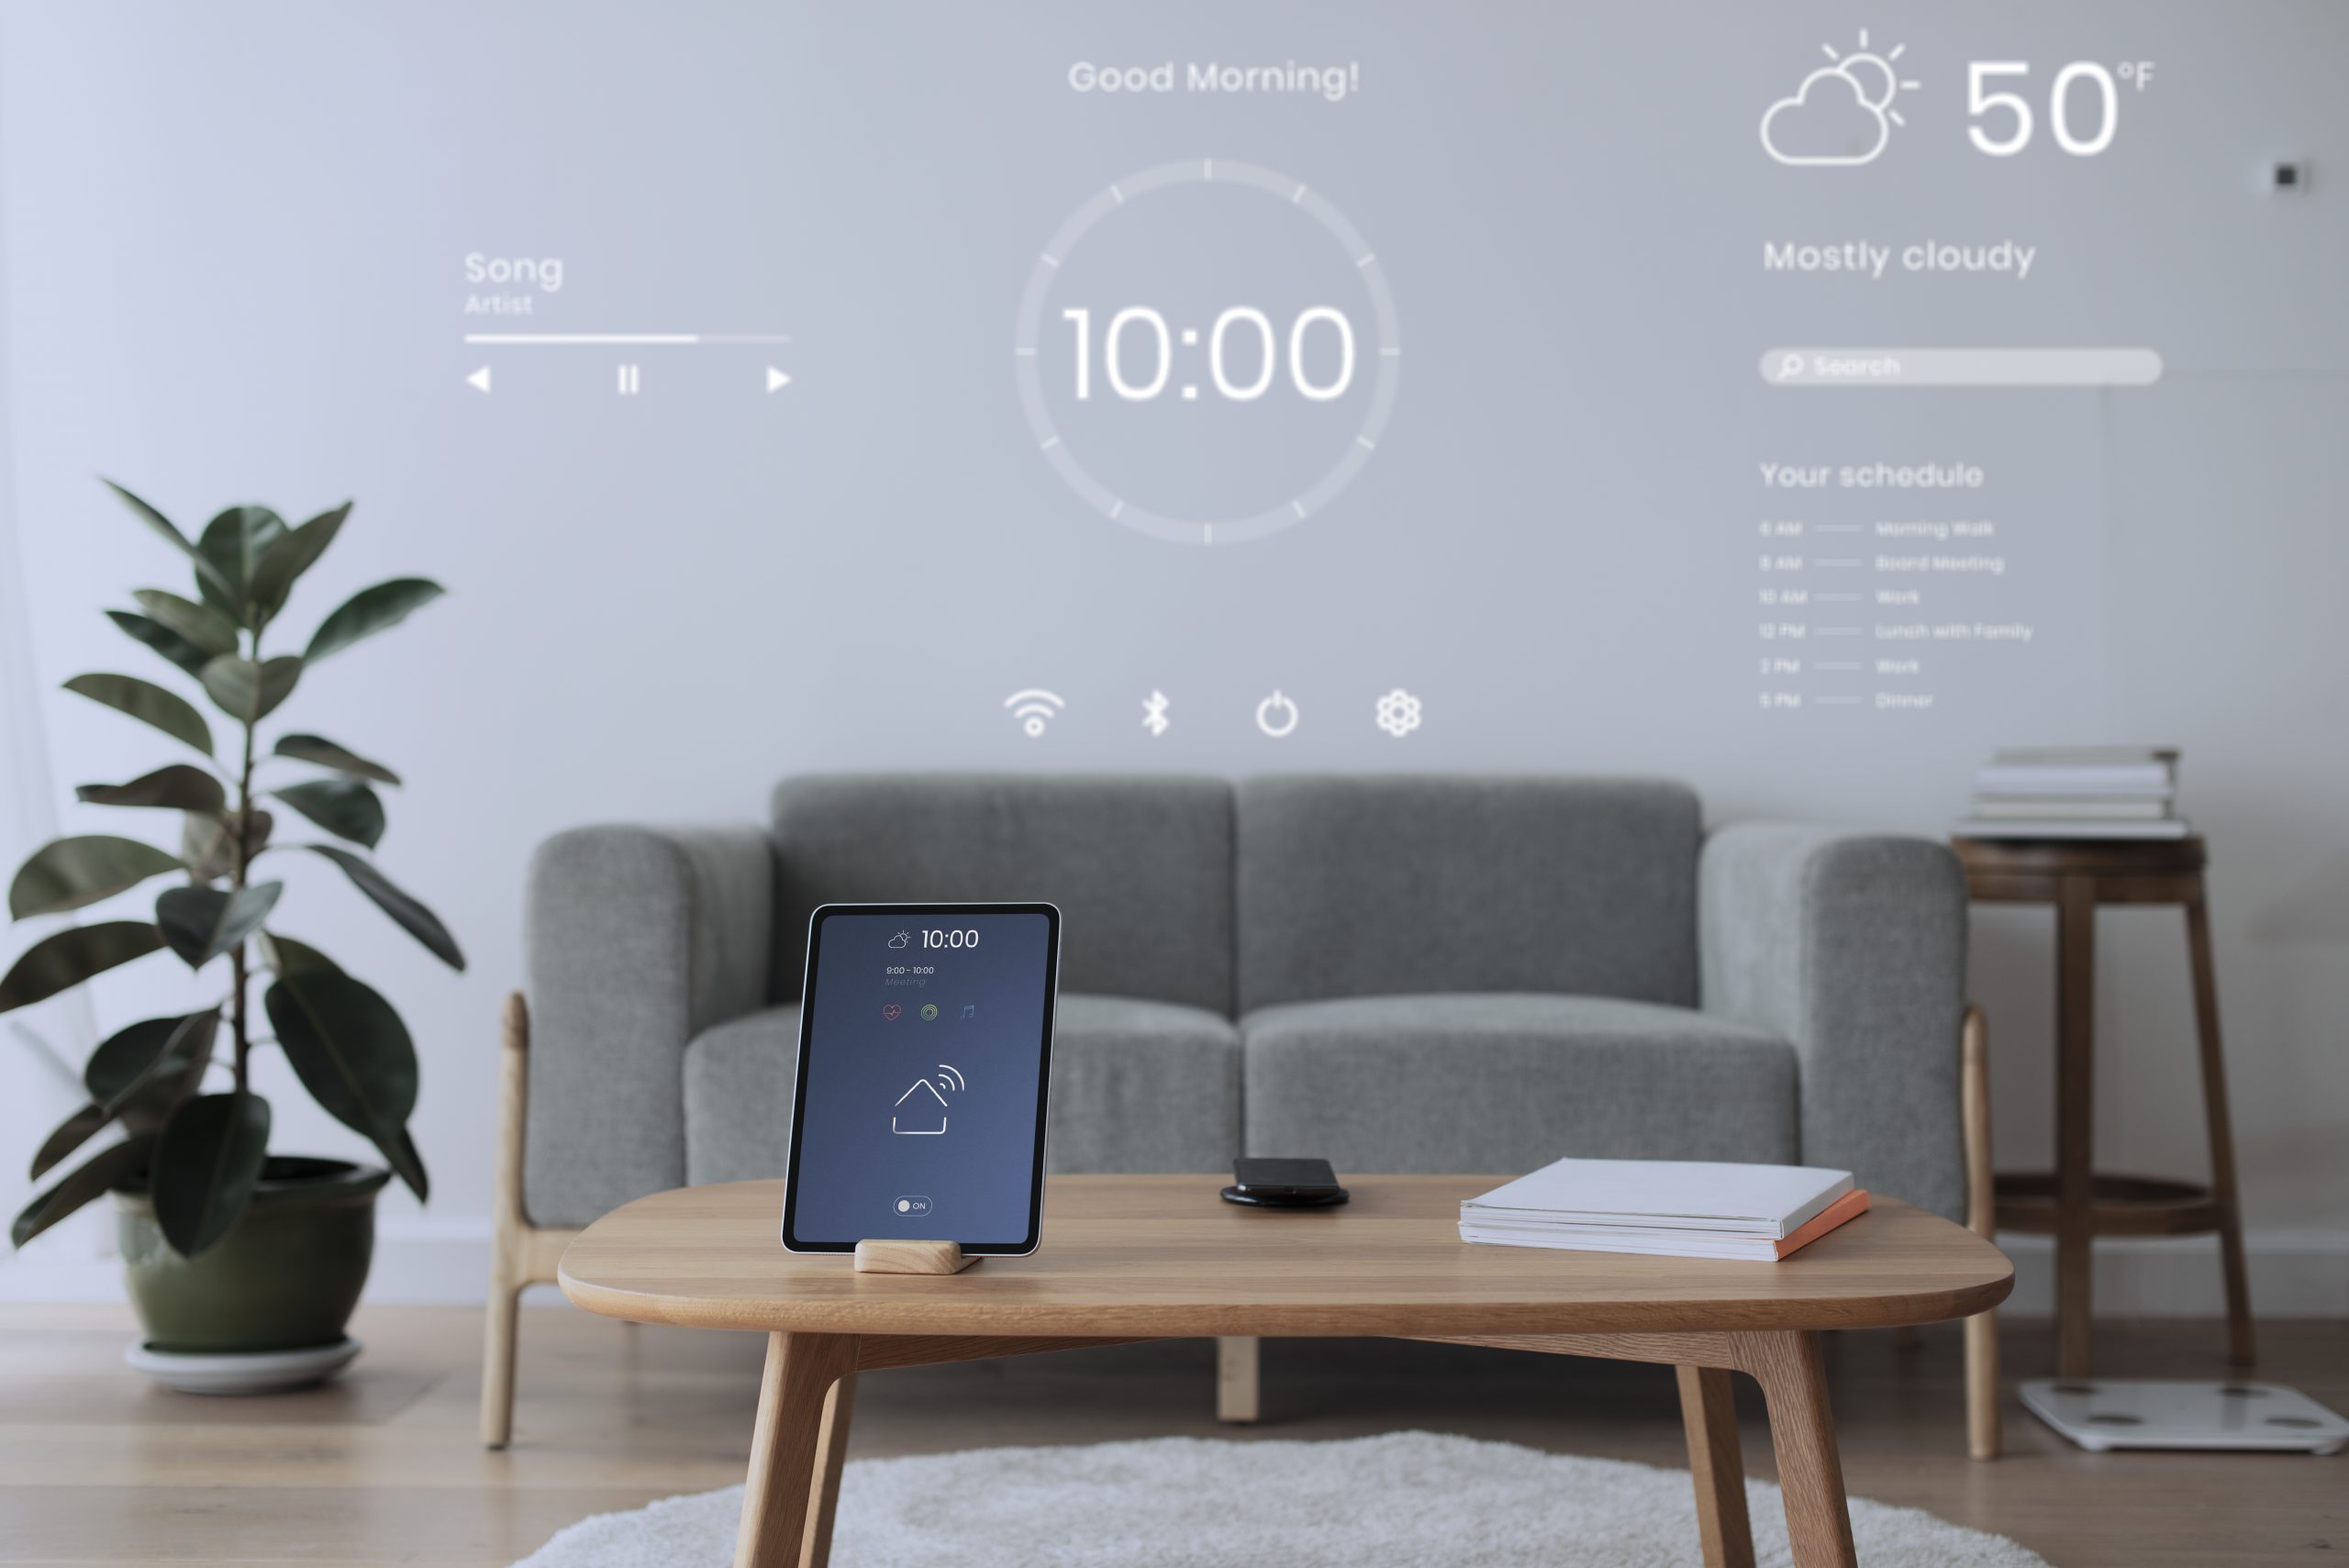
To set the picture, let’s begin building an app for a humidity sensor in a small greenhouse. Before we get into the more technical aspects, you’ll need to flesh out your app first. You can start by playing around with the Appli Builder and apply elements like buttons and displays that help refresh your sensor’s data and display it.
Alternatively, you can add a second screen to your app to store and display historical data, which will allow you to see the fluctuations in humidity over time. You can later juxtapose this information with other data to improve your greenhouse practices.
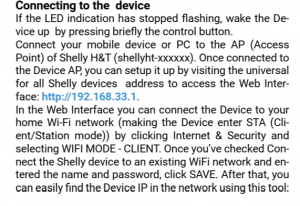
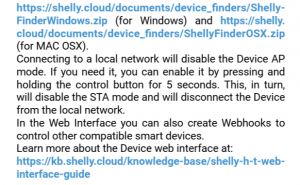
Once your app is ready to connect with the IoT device and receive data, it’s time to retrieve some network information. All IoT gadgets connect to a network through an IP address, which you can usually see in the device’s manual. For example, here’s a screenshot of a device manual with its IP address and network information:
After you’ve got that, we head back to Appli.
Our Appli Connect low-code feature allows you to make a REST API call to connect to such devices. To configure it in your app, click on the low-code option on the bottom right side of the screen.
Making sure the device was properly connected is a matter of trial and error. At first, you might get messages on your app like “device not found” or “wrong password,” but after a few iterations, you should be able to get a reading and continue doing so. Like that, you can begin your IoT device management journey, all from scratch.
Looking Ahead: Deploy and Upkeep your App
Once you’re confident about your app’s layout, features, and functionality, it’s time to deploy it. To do this, download the Appli Player app on your phone and input your app’s code to quickly launch it on your phone.
As time goes by, you’ll want to add more features, download the data, or make tweaks. You can! It’s just as simple as going back to the Appli Builder to continue working on the app, then refreshing the app on your phone to see the changes. Plus, the app can be downloaded on multiple devices in case you need to view it on different ones, or someone else needs access to it.
Going the extra mile by building your own app for easier IoT device management will give you more flexibility in the long run, as you can tweak features, layouts, and more easily handle data. Plus, it can be a fun class project, a new personal hobby, or a quick way to develop a much-needed tool at work. And, if you’re ever in doubt about any of Appli’s elements or feel stuck, you can click the Appli Bot at the bottom of the platform and ask it any questions.
Have any questions about Appli that you’d like to discuss with more people? Our community Forum is available at any time to start conversations with other users and the Appli team. You can join it here!